
Before you start reading, if you want to catch up on part one and two just click below.
If you are all caught up let’s begin with part 3. We finished off last way back in time at university. Well now we move forward a bit and it is time for a bit of self exploration. Now it is time for ‘The Elephant Who Forgot What He Was’. This is a beautiful poem I found online by Christopher Ronald Jones (if you are reading Chris please let me know what you think of my adaptation, would love to get in touch). I had decided after illustrating an Australian classic it was time to dip my toes into the water of children’s poetry, and see what my imagination came up with.
This little project took me about a month to develop from concept to completion and is still one of my favourite personal projects to date.
It started like all good picture books do, with a pinch of reading, a dash of pagination and a big dollop of story boarding. I spent about a week figuring out the layout of this 32 page pipe dream and then off I went full steam ahead into the fun of character design and creating an aesthetic for this sweet little story.
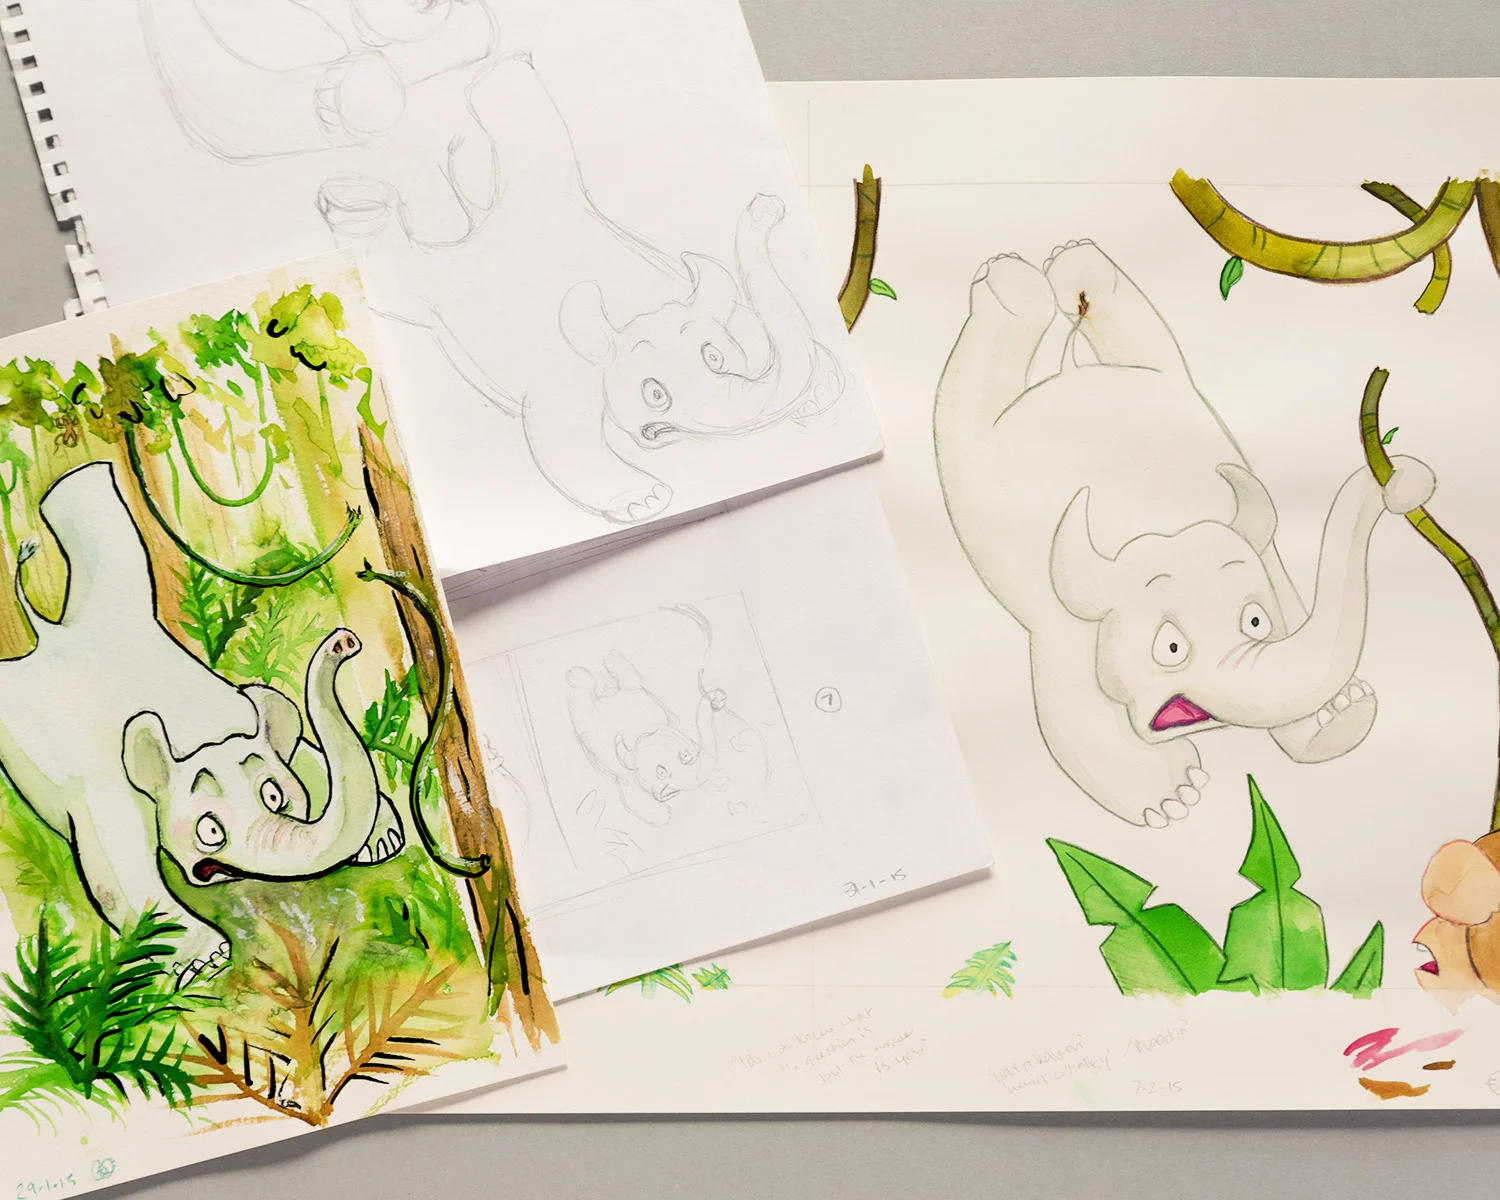
A little run down from concept sketch and story board to design and the final page illustration.
To build my characters, all of which were from the animal kingdom, I did a bit of background study. I researched the way the animals looked in reality, the way the move, their skeletal structure. I researched everything I could so I could make a believable character. I also wanted the designs to be youthful, the characters to be filled with abundant energy and expression, to reflect that of the little readers this book is intended for. This little nameless elephant may still be one of my favourite creations to date.
Playing around with character design also meant playing around with medium and I couldn't go past my favourite medium, water colour. Painting with water colours is what I have grown up doing and the whimsical look of the medium felt perfect for this little kids book I was creating. I also liked the soft and simple colour palette this allowed me to have. And using water colour pencils I completed to look with subtle outlines to really make the illustrations pop.
The illustration process for this project was tailored into an art form. I will leave a little step by step below for anyone who would like to follow along the process to make their own beautiful book.
The Making of a Picture Book
note: this is not a detailed process, this will come in later blogs ;)
step 1: Create small story boards of the spreads
step 2: Scan all these quick little story boards into the computer and lay them out on inDesign with text in the desired spaces to make sure the text fits well with the illustrations and that blank space is left for it. (super important step!)
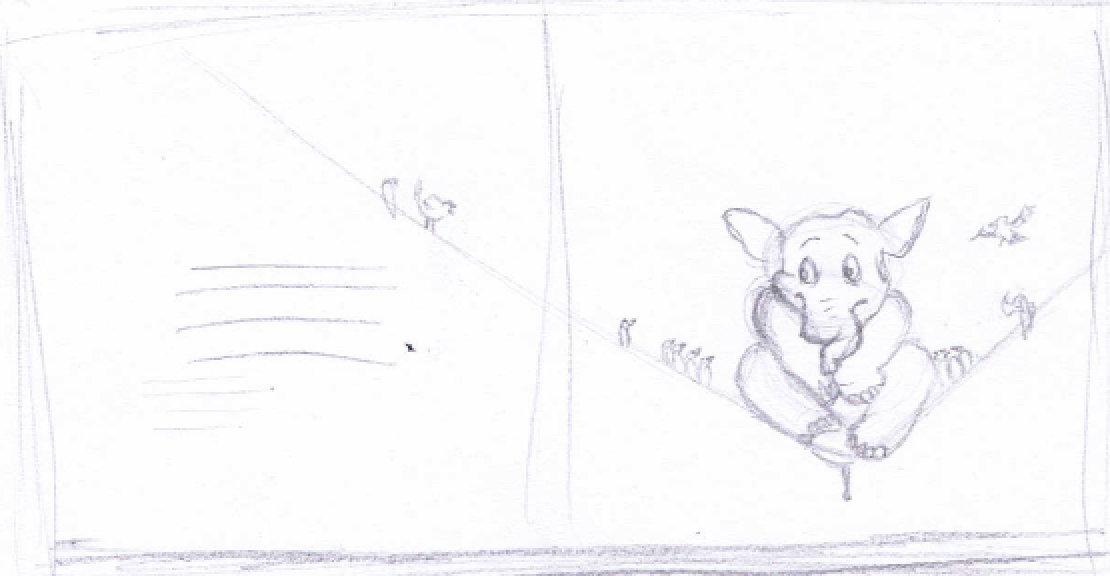
quick story board thumbnail sketch of a spread from ‘The Elephant Who Forgot What he Was’
step 3: Print out these spreads to the size of the finished book and using a light box draw more detailed sketch of all the pages. This step is where you get to experiment and really secure the look of the book.
step 4: Rule out 1:1 scale spreads on watercolour paper so you have a clear idea of the space for your pages and page bleed.
step 5: Using a light box trace the sketches onto your beautiful fancy paper. This is ideal as it means your line work is perfect and no sketch marks will appear in the finished piece.
step 6: Carefully and creatively paint out the water colour spreads on the fancy paper. Layer your colours so that they don’t warp the page and create smooth gradients and flats.
step 7: Time to go in with water colour pencils to shade and outline.
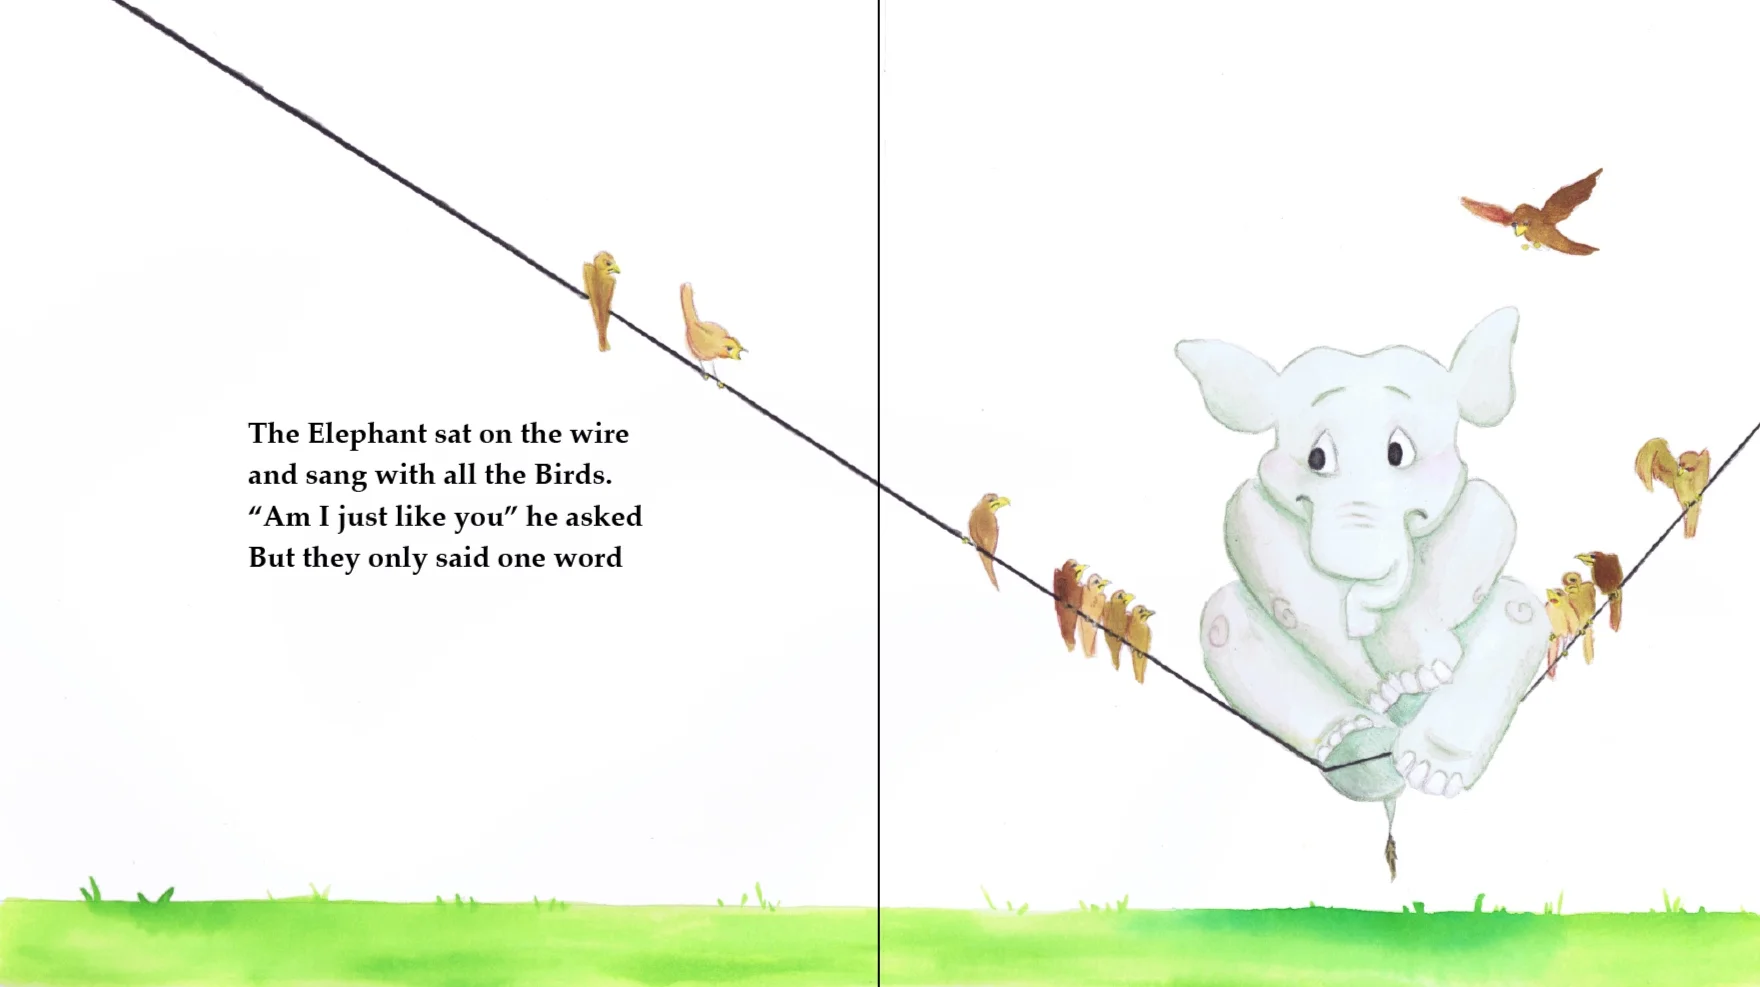
Finished spread from ‘The Elephant Who Forgot What he Was’.
step 8: Take photos and/or scan in the finished artwork and place into inDesign spreads.
step 9: Do some colour touch ups and finalise your typographic approach.
step 10: Make your end papers and cover for the book.
step 11: Print, publish and feel fabulous because you just made a gorgeous picture book.
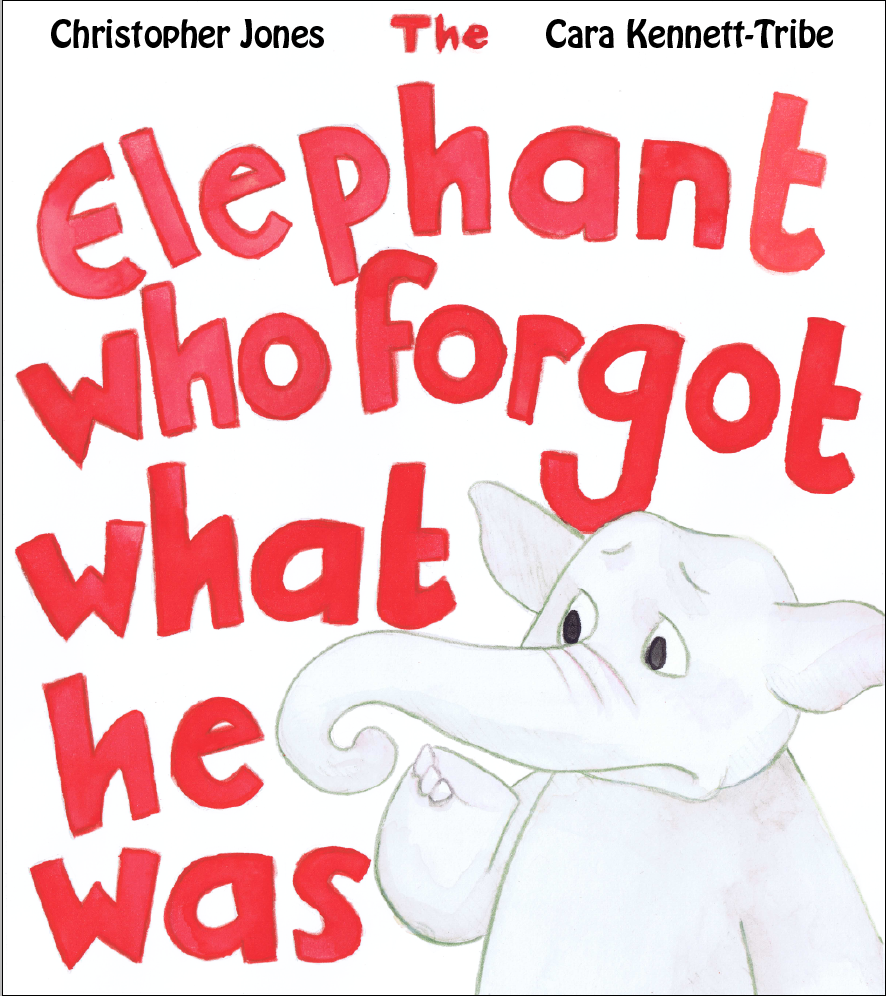
Cover for ‘The Elephant Who Forgot What he Was’.
This book came from reading a simple poem and seeing a world of stories. It came from wanting to make something and actually taking the time to do it, and it is probably what I am most proud of because of the fact that I took the time to make this little book a reality. This book is currently unpublished as I don’t own the rights to the story and cannot contact the writer, but that just means that my journey to a published picture book is not over.
A side note, if you are a writer and you want to see your picture book brought to life please feel free to contact me and we can make it happen, nothing would make me happier then creating a little more magic for the page.
For now, I will say goodbye. We still have quite a journey left ahead of us, but for the moment I think I will let you ponder this cute little elephant who forgot.
Talk soon,
Cara